Template routing aids are great for cutting shapes on plexiglas. This tool will speed up the process of creating complex designs when you use your router. This guide will discuss some of the top templates and their features. Learn more about Festool plungers and Flushtrim and pattern bits. These tools are essential for getting started.
Festool Plexiglas Template Routing Aid
You might be considering purchasing a Festool instrument. The tool's benefits include dust extraction and measurement guides. However, these features might not be important to you. Moreover, you may not be using it enough to justify the price tag. In such instances, you might want to opt for a simpler alternative.
Festool Plexiglas Template Guitting Aid is versatile tool that can be used as a cutting instrument to create slots, grooves, mortises, and other shapes. It comes with two adjustable fencing for different material thicknesses. There is also an integrated rule to create grooves. The Festool Plexiglas Template Routing Aid makes it easy to create any kind of project.
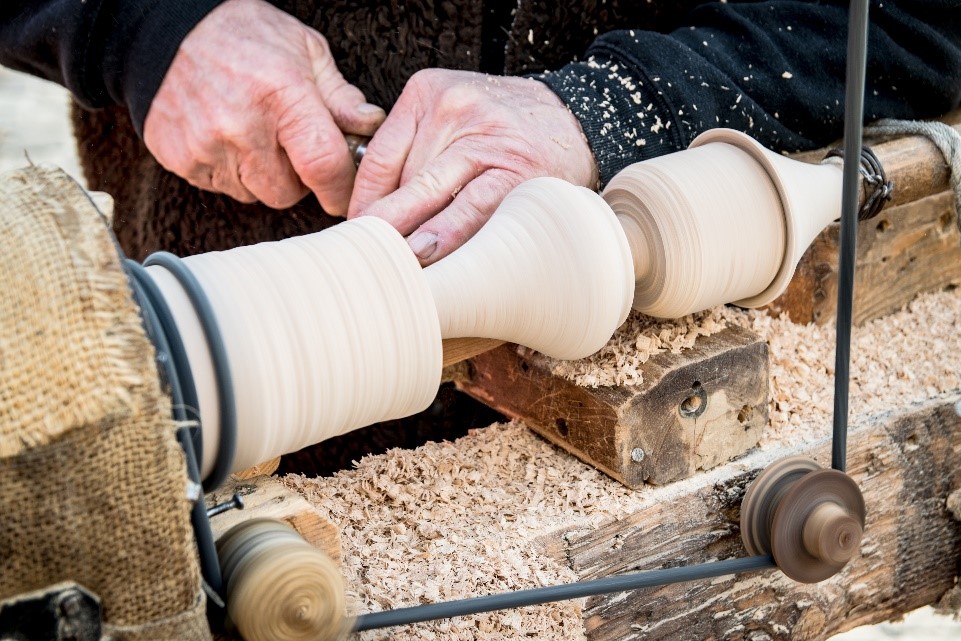
Festool plunge routers
The plunge router is a popular choice among homeowners looking to make a template. They are more user-friendly, less bulky, and weigh less that 10 pounds. These routers can be used to cut hardwoods like maple and oak. A plunge router's plunge depth, power, and plunge angle can vary, so be sure to purchase the right one for your needs. Learn more about the different types of plunge routers to help you decide which one is right for your needs.
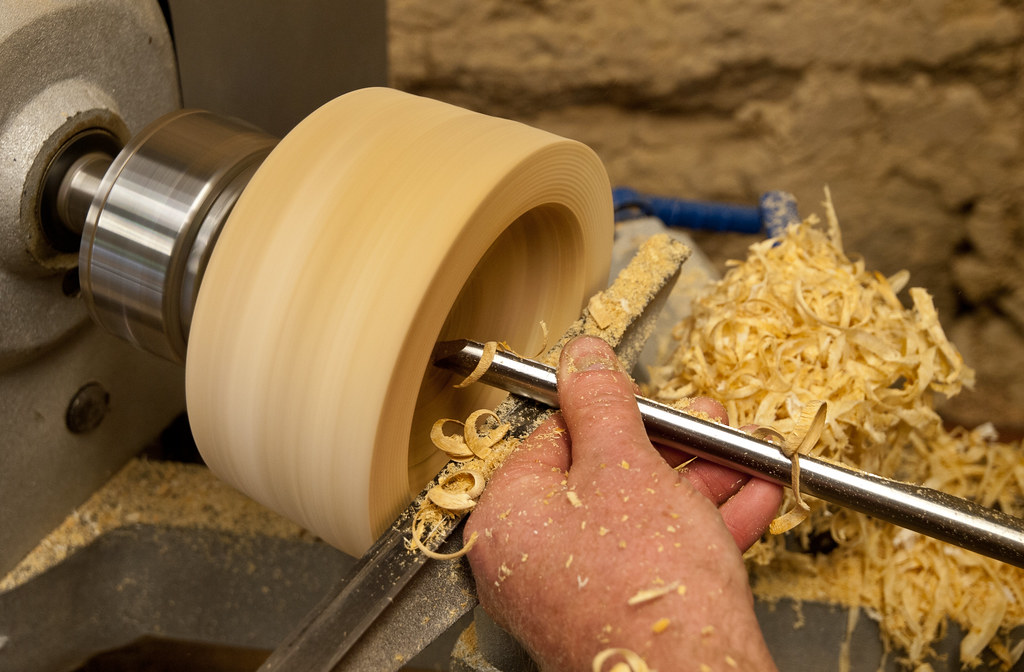
Whether you're looking to create circles, shapes, or other patterns, a plunge router has many accessories to help you create the perfect cut. The dust collection system for plunge routers is essential to ensure that the bit does not become clogged with debris. Plunge routers can also be used to make perfect circles, especially if they're attached to a template jig. These jigs work well for many tasks, including painting and sanding.
Flush-trim bits
If you want to cut veneers or laminates flush with the edge of your workpiece, a flush-trim bit is the best tool to use. These bits feature a bearing at the base of the shank that rides along the workpiece. The sheering action of the bit forces the material to fall flat, leaving a clean cut. Imagine a paper shear. The base material acts just like a table. The down-cut bit is long and curved.
A woodwork shop needs flush-trim bits. These bits can be used to cut laminates, veneers, and shelf edge. These router bits can also be used for smoothing and straightening edges. These router bits are the most commonly used ones in the shop. But if you intend to make more than a few pieces at one time, you might consider buying multiple bits in different sizes. Flush-trim bits with a 1/2" diameter are an excellent combination.
Pattern bits
Pattern bits in template routing are a useful tool for producing repeatable patterns. They have a central ball bearing that can be held to the template and can be used in conjunction with the router. They're a good choice for many uses. Here are some benefits to pattern bits. These bits provide greater visibility and better control of your project. These bits can also be used with handheld routers.
Combination bits have bearings at the tip and shank, so you don't need to change bits for different templates. You can choose from straight or compression cutters. The compression bits are available in straight or pattern versions. These router bits are much more cost-effective than spiral bits and leave a smoother work surface. You should combine a combination bit with an bearing-guided templates for best results.
Take off on the climb

Climb cuts are a way to make a template out of wood. These are spiral-shaped cutting methods that make precise and clean cutouts along the end grain. However, they can be problematic because they can cause tearout and chipping of the wood. For those who aren't sure how to do climb cuts in your template routing, keep reading. For complex patterns, climb cuts should be reserved.
A climb cut can be described as the reverse of a normal feeding. The bit rotates in an opposite direction from the feed. Instead of resisting material, the cutter tries accelerate it in same direction as wood. If this cut is done incorrectly, the cutter can easily grab the work and pull it out with tremendous force and speed. Climb cuts can be used to minimize tearout, as the bit enters or exits the cut face.
Calculate offset between router bit & template
Offset refers to the distance that a router bit cuts from a guide. Calculate this distance by multiplying bit diameter by guide bushing diameter and then divising by 2. This table shows the typical offset values for commonly used guide-bit and router-bit combinations. Be aware that not all offset values are equal. Some may be too large and others too small. In the following example, the offset will be 1/4".
The Offset between router bit and template routing is usually about 1/8" or 0.35". This offset is crucial because it ensures that the bit fits into the bushing if it isn't perfectly centered. It is common for a template to be misaligned or lopsided, making routing difficult. You can easily correct this problem by adjusting your offset. For example, if you are attempting to rout a mortise, you should adjust the offset between the template to match the desired profile.
FAQ
Where can I find free woodworking plans?
To find free woodworking plans, you don't have to buy any magazines or books. Search Google for free woodworking plans. Search Google for "free woodworking" to see hundreds of sites that provide free plans.
How does a beginner woodworker earn money?
Many people are starting to learn how to build furniture because they want to start an online business. If you are just starting to build furniture, there are many other ways to make money than selling on Etsy. Local craft fairs and events are great places to sell your products. For those who want to build their own furniture, you might offer workshops. Perhaps you have some experience as a carpenter/builder and would like to offer your services, such as remodeling homes and creating custom pieces.
Is it possible to learn woodworking by yourself?
You can learn everything best by doing. Woodworking takes practice, skill, patience and experience. It takes time to master any craft.
Learning how to do something is best done by doing it. Start small and learn from your mistakes.
Where can you buy hardwood lumber?
Home Depot offers hardwood lumber. You can find all types of wood products at Home Depot, such as flooring, cabinets and furniture.
They also have an extensive selection of engineered hardwoods such as Ipe (Araucaria Angustifolia), Brazilian Cherry (Pau d'Arco), and Mahogany (Swietenia Macrophylla).
You can search Google for hardwood lumber to find them online.
Statistics
- In 2014, there were just over 237,000 jobs for all woodworkers, with other wood product manufacturing employing 23 percent; wood kitchen cabinets and countertop manufacturing employing 21 percent. (theartcareerproject.com)
- The best-paid 10 percent make $76,000, while the lowest-paid 10 percent make $34,000. (zippia.com)
- Woodworkers on the lower end of that spectrum, the bottom 10% to be exact, make roughly $24,000 a year, while the top 10% makes $108,000. (zippia.com)
- Most woodworkers agree that lumber moisture needs to be under 10% for building furniture. (woodandshop.com)
External Links
How To
How to join wood without using nails
Woodworking is a favorite hobby. Woodworking is a relaxing hobby that allows you to use your hands to create useful things from wood. You may need to join two pieces without the use of nails. This article will help you to maintain the beauty of your woodwork projects.
First, remove any sharp edges from the wood pieces before you join them. Do not leave any sharp corners as they could cause problems down in the future. Once you've done this, you're ready to start gluing your boards together.
If you are working with hardwood, only one side should be glue. For softwoods like cedar and pine, glue should be applied to both sides. Apply the glue to the boards and press them down until they are securely attached. After applying the glue, let dry the boards before proceeding to the next stage.
After you have glued the boards together, drill holes in the joints where you intend to place screws. You can choose the type of screw to determine the size of your holes. For example, if you're going to use a 1/2-inch wood screw, then you should drill a hole that is at least 3/4 inches deep.
After drilling the holes, you can drive the screws into your board's backside. You should be careful not to touch the board's front surface. This could cause damage. Don't drive the screws too far into the end. This will prevent splitting the wood's end grain.
After your project is completed, you will need to protect it from the weather. You have two options: seal the whole furniture piece or just the top. Either way, you'll want to use a product that will last for years to come. You can choose from oil-based varnishes or polyurethane, shellac and lacquer as examples.
These products can usually be found at any home improvement store. Be sure to choose the right one for your project. Don't forget to keep in mind that some finishes are toxic. Protective gear should always be worn when handling these finishes.